When you are out in the field and using neutral density filters, making the calculations required to work out either the best or correct exposure times for any specific filters can often become confusing. Calculating a stop of light variation in shutter speed is a simple mathematical formula – you either double your exposure time when making adjustments of 1 stop darker or halve your exposure time when making adjustments of 1 stop brighter. So basically a stop of light is a doubling or halving of the amount of light let into a camera when capturing a photo.
An example of this is by going from a shutter speed of 1/100 secs to 1/50 secs – this is an increase of light by exactly 1 stop, thereby increasing the amount of time allowed to capture the exposure. In the opposite direction, a change in shutter speed from 1/100 secs to 1/200secs is a 1 stop reduction in light, which has reduced the amount of time allowed to capture the exposure. To calculate larger variations in stops of light such as 6 stops, each variation of stop needs to be doubled or halved 6 times. So in our example of 1/100secs, to get to 6 stops slower (this would be the case if you used one of our 6 stop neutral density filters) in shutter speed we need to halve the output of 1/100secs divided by 2 a total of 6 times – for the end result of 0.6 seconds.
Now we know this can sometimes be confusing! This is exactly why we have created the NiSi Filters App. We would much rather be focusing on producing images rather than making crazy mathematical calculations while we are out shooting. Photography and light, in general, is quite mathematically and scientifically technical when it comes to the exposure triangle. The fun factor of photography comes through in producing incredible images, enjoying your surroundings and going on amazing adventures. The more you can concentrate on enjoying that by simplifying your photography, the better it is!
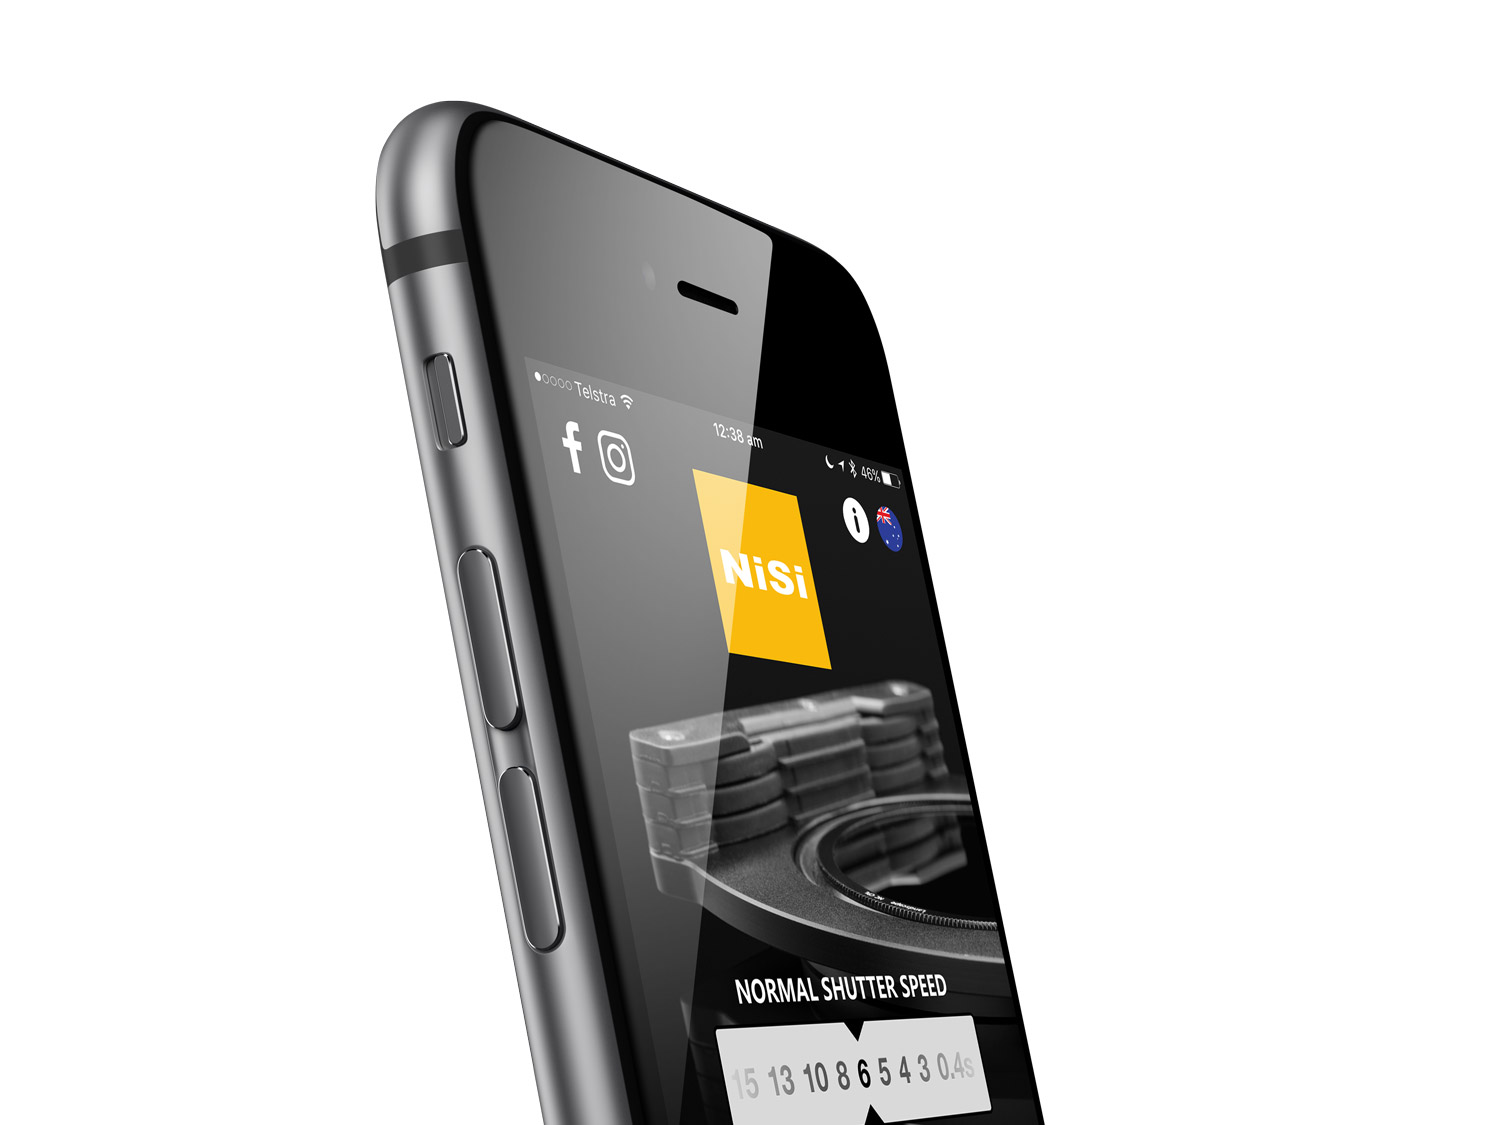
Available FREE on the Apple App Store and Google Play Store.
The NiSi Filters app, which is available on both iOS and Android, has been designed to be as simple to use as possible and to provide the calculations required to ensure you are either able to dial in your exact required shutter speed or to assist you in making the best choice of neutral density filter for your chosen shutter speed. The interface design is streamlined to input and display the information that is required to output your desired shutter speed when using neutral density filters and includes a timer for when your shutter speed will need to go over 30 seconds, which is the meter reading limitation of many DSLR and mirrorless cameras. The information is also available in English and Mandarin by selecting the language in the top right-hand corner of the app.
Let’s take a look at the process and steps involved in using the NiSi Filters App below and we hope our app helps you to save time and brainpower when you are out and about shooting!

Step 1 – Calculate your base exposure times without any neutral density filters
Calculating your base exposure time will need to be done without any neutral density filters, although can be done with a circular polarizer attached to your lens. To do so, set your camera up on your tripod and into manual mode. Set your focus and exposure points on the part of the scene you want to expose for. Next, dial in your desired aperture and ISO setting, and then set your shutter speed so that the meter reading gets exposed at +/- 0EV (unless you are deliberately trying to overexpose, or underexpose parts of your scene).
Take note of the shutter speed, aperture, and ISO settings. Throughout this process, to calculate the correct exposure speed your aperture and ISO settings need to remain consistent. We will use the following example of starting settings throughout the rest of this guide –
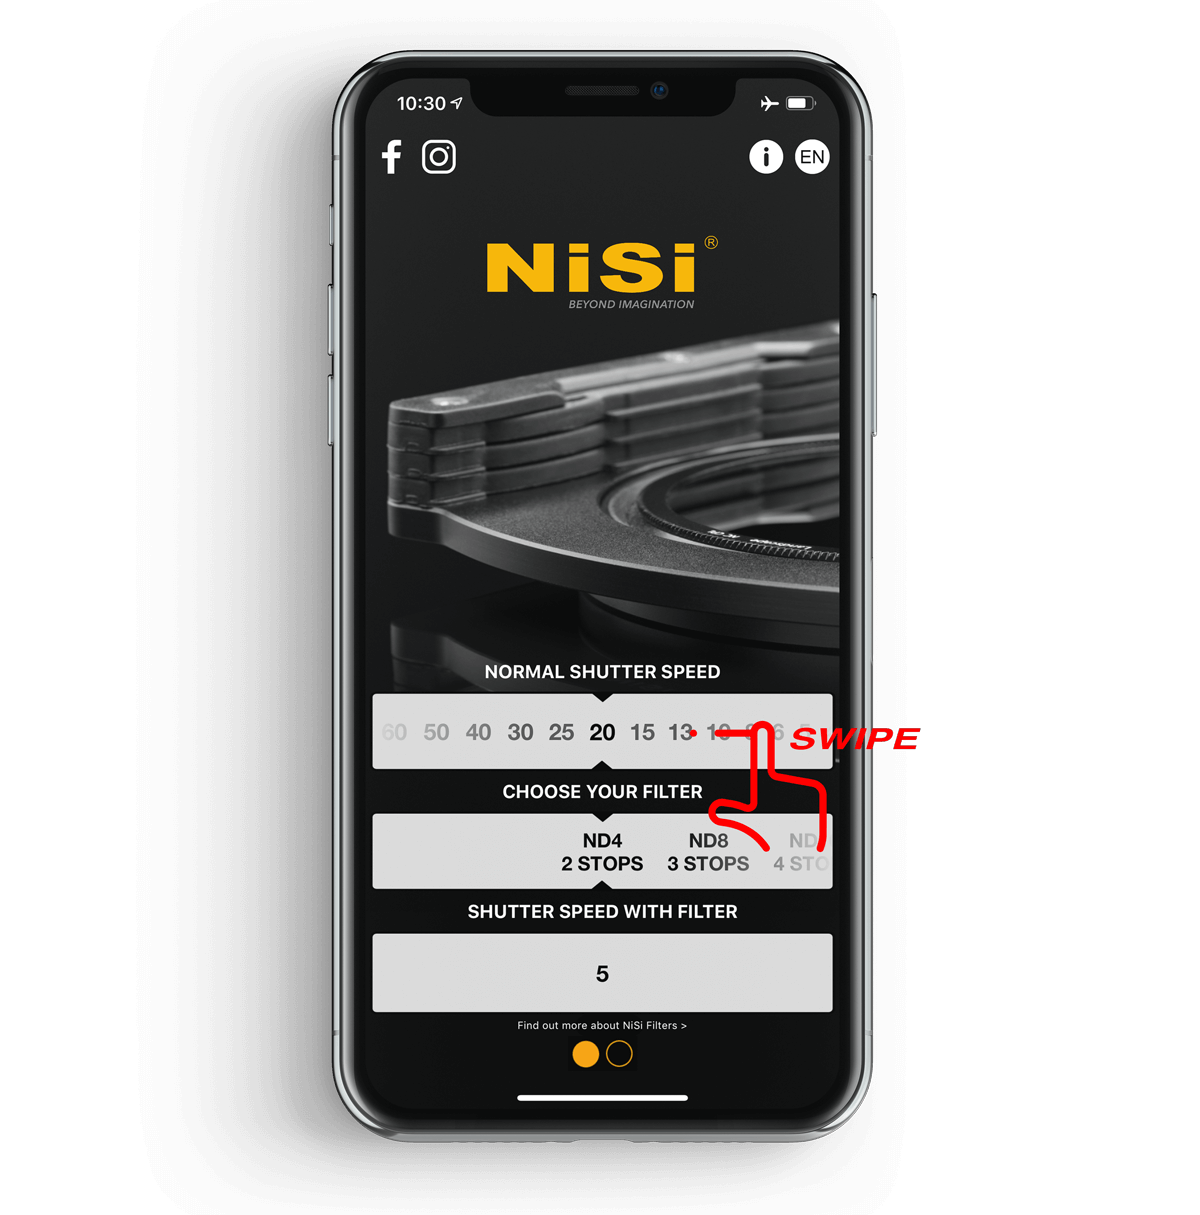
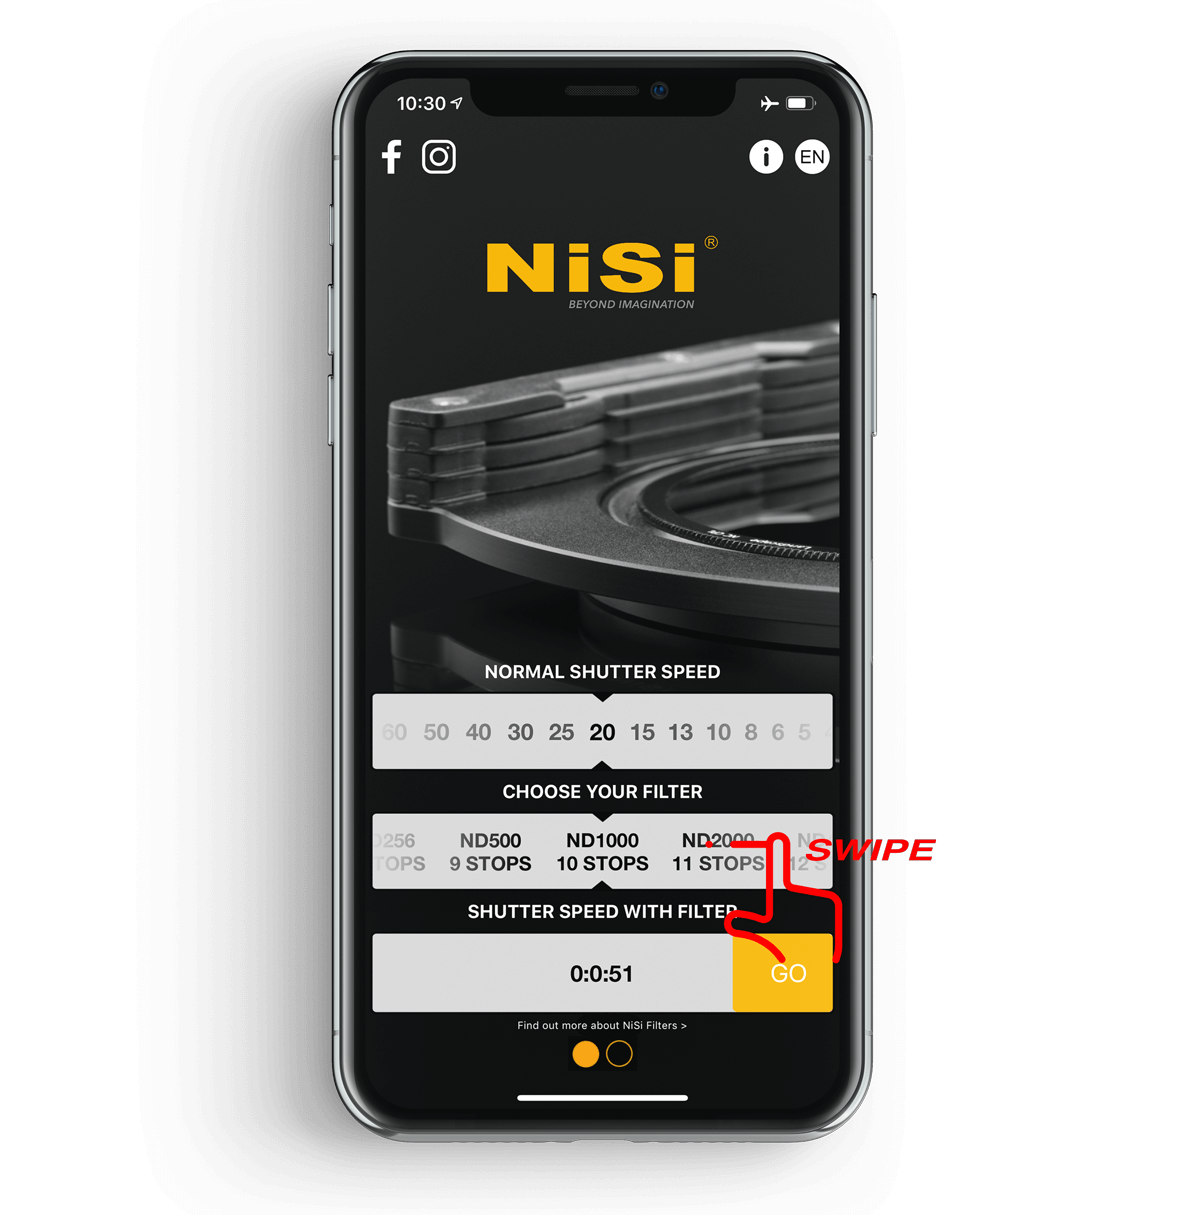
Normal shutter speed (no ND filters) – 1/20 secs
ISO – 100
Aperture – f/11
Shooting mode – Manual
Step 2 – Dial-in normal shutter speed into the NiSi Filters App
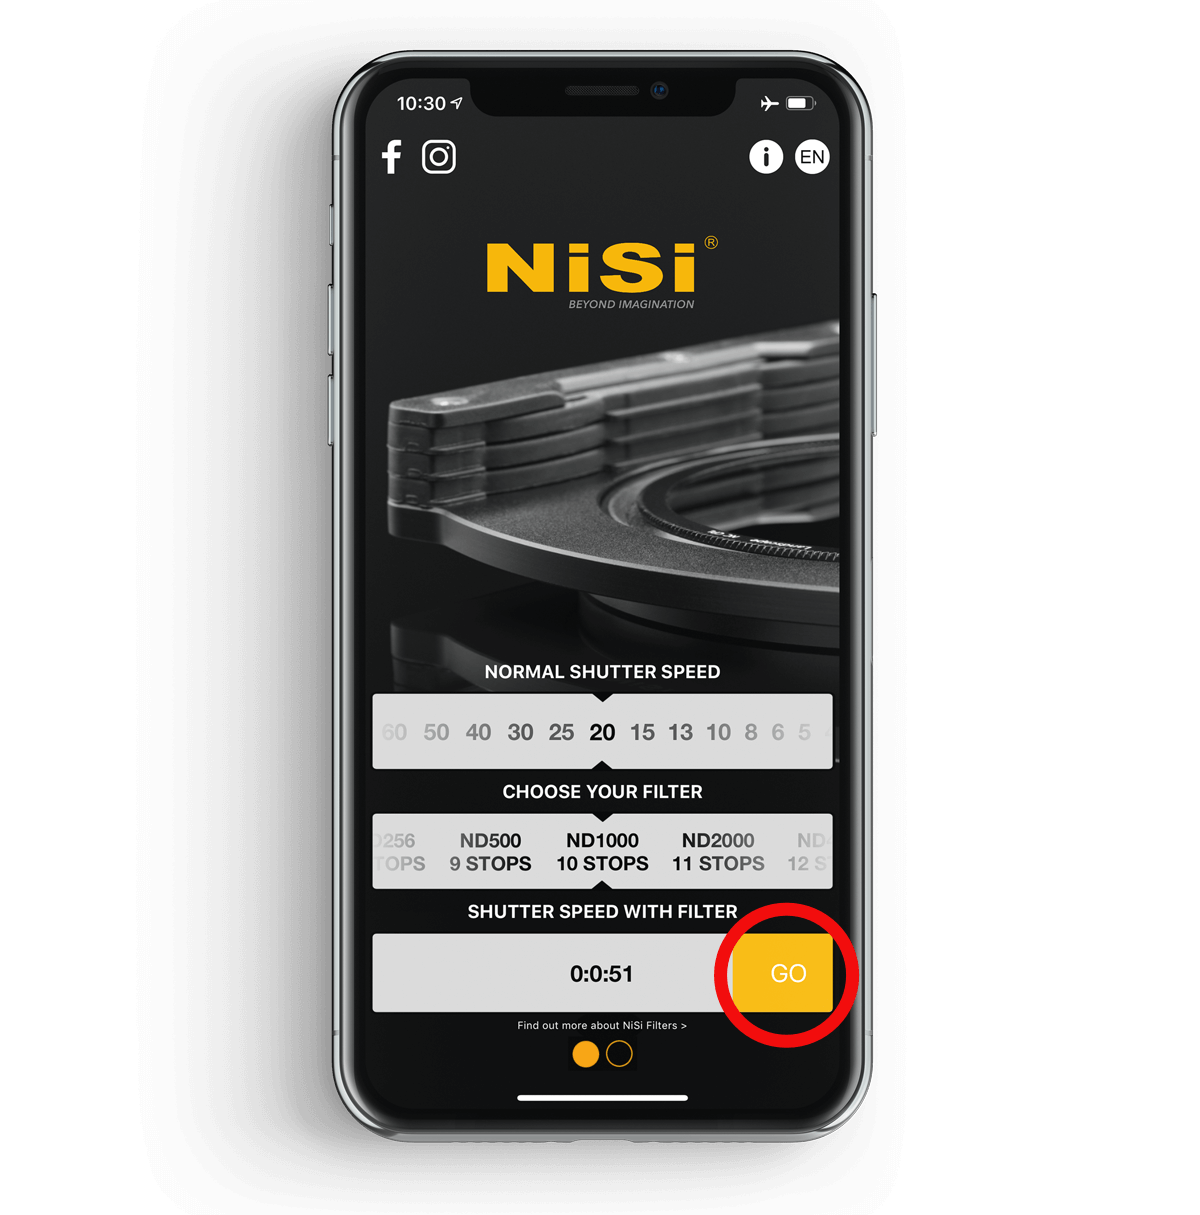
Once you know the normal shutter speed, aperture, and ISO, the rest of the calculations will be based on only the shutter speed, with the rest of the settings needing to be the same. In the NiSi Filters App, the first rotating dial is where you input the normal shutter speed. For our example, we are using 1/20 secs. To dial this in, the number “20” will be selected.
Step 3 – Choose your desired ND filter density
To be able to output the correct shutter speed while using any ND filters, or to help you make the best selection of ND filters to get to a specific shutter speed, the second dial in the NiSi Filters app is “Choose Your Filter”. If you know what ND filter you are going to be using, e.g an ND1000 or 10 Stop ND, it is just a matter of selecting the correct value. Once you dial that selection in, you will see the “Shutter Speed With Filter” value within the app outputting the shutter speed that is required to get a correct exposure. At 1/20 secs normal shutter speed, a 10 Stop variation in exposure time will be 51 seconds.
If you don’t already know which filter you are already going to be using, and are making that decision based on the information in the app, the shutter speed you require can be achieved by again rotating through the values in the “Choose Your Filter” until you get as close to possible to your chosen shutter speed. You would then base your ND filter selection on this information. For example, if you know you want to have a shutter speed of 0.4secs to maintain texture in moving water, by rotating through the selections you would see a required filter of ND8 or 3 Stops to get to that shutter speed.
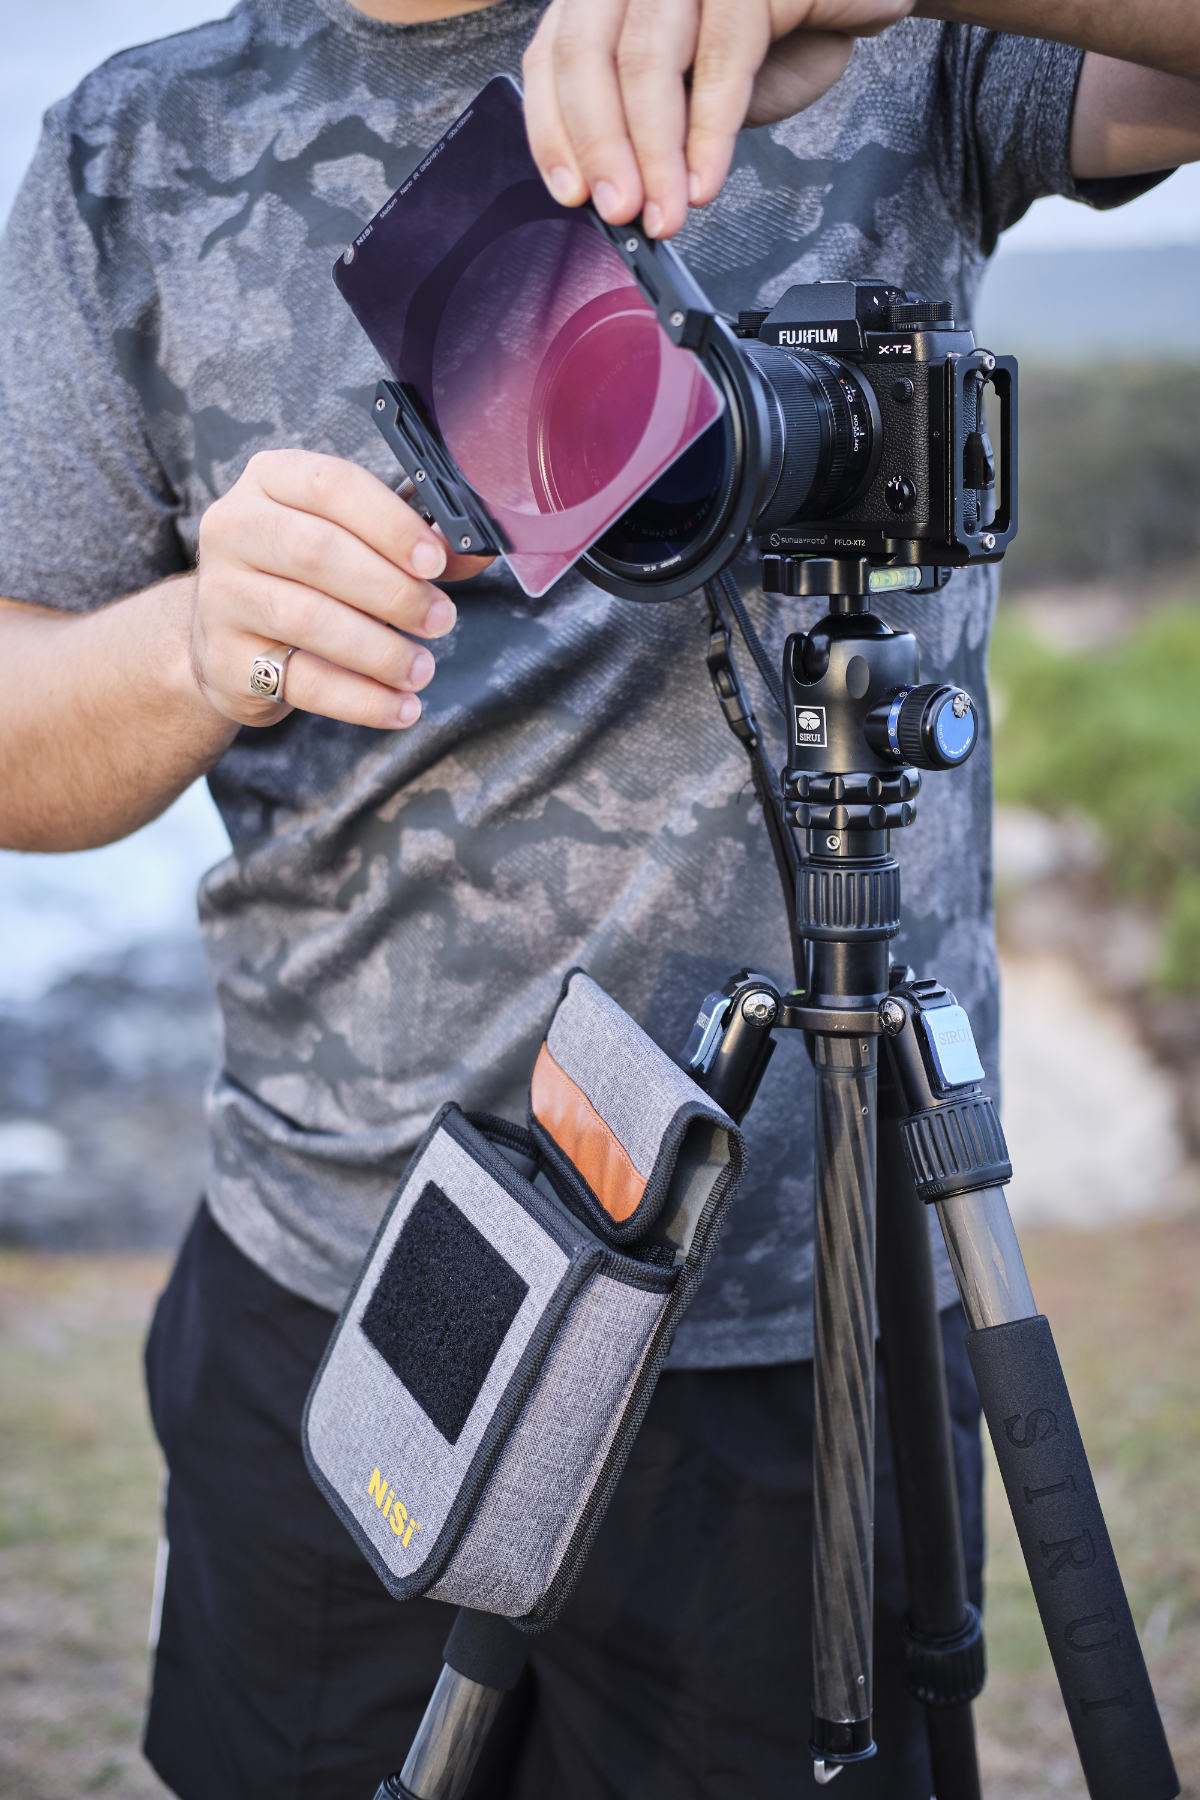
Step 4 – Attach your neutral density filters to your lens
Once you know all of the above settings and information, you can then attach your neutral density filters to your camera. Something to remember is that in falling light during sunset, or rising light during sunrise, your shutter speed may need to vary as the amount of light available to your camera changes. So getting from the base calculations to this stage may need to be done reasonably quickly to ensure your calculations are correct.
Step 5 – Dial in the correct camera settings and shoot!
So we have our required shutter speeds with the neutral density filters attached in the above steps. If required shutter speed is above 30 seconds, most DSLR and mirrorless cameras will need to be switched into Bulb mode. If the required shutter speed with the neutral density filters attached is below 30 seconds, leave your camera in manual mode. The NiSi Filters app will show a countdown timer which can be triggered by pressing “Go” if the required shutter speed is above 30 seconds. Trigger this at the same time as you press your camera shutter button, and stop your camera when the timer runs out.
As mentioned above, it is important that the aperture and ISO settings remain consistent with what you started with. The only setting that needs to be changed at this point is the shutter speed. Once the settings have been dialed in correctly, it is a matter of shooting and basing any further changes on either your histogram reading, or by repeating the steps above when the light has shifted or changed too much to get your normal shutter speed again, and using the app to do the rest of the calculations for you!


